Canon R5 II Underwater Settings
Posted by Nirupam Nigam on September 10th, 2024

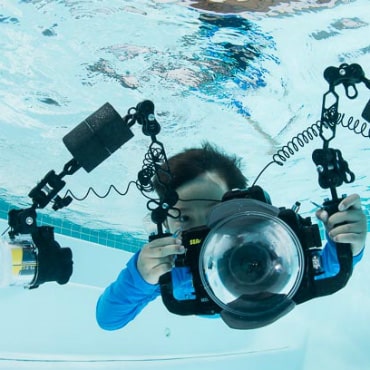
The Canon R5 II has been the world's most anticipated camera these past few years and it's finally out! So be sure to check out our favorite underwater housings for the R5 Mark II. We've had the opportunity to dive extensively with the camera in Port Hardy, BC, Canada - one of the world's top diving destinations. While it is quite similar to the original Canon R5, thankfully the R5 II is more streamlined. It has more intuitive settings and a better menu system. For current Canon shooters looking at upgrading their camera, getting used to the R5 Mark II only takes a minimal adjustment. And we're here to help! This guide represents our favorite underwater settings for the Canon R5 Mark II for both underwater photo and video.
Important Dials, Buttons, and Switches

The R5 Mark II has seen a few updates to the camera body that make both photo and video more seamless underwater. Fortunately, there is a new photo to video switch on the top right side of the camera that allows you to easily switch between photo and video. This is separate from the mode button/dial on the right. So if you switch to manual mode with the mode dial, if you switch from photo to video with the left switch, you'll still be in manual mode.
The on/off switch on the top right of the camera unfortunately has a lock mode which can make it difficult to change your exposure settings. Make sure that when you are turning your camera off and on that you make sure it's in "on" mode rather than lock mode.
When it comes to your exposure settings, there are three important dials on the Canon R5 Mark II - the back dial, the top back dial, and the top front dial. These can be used to control your ISO, Shutter Speed, and Aperture. They can be custom set so that you can assign a specific dial a specific exposure setting.
Finally, the Q button on the back of the camera is a quick access menu that allows you to access all your camera's most important settings with a single press of a button.
Considerations for Using the R5 II's Dials and Joystick Control

The Canon R5 Mark II features a joystick on the back of the camera that can be use to move your cursor in the menu and set your autofocus point. This is a nice feature for side shooters, but underwater it makes things a bit tricky. This is because Canon decided that the joystick was enough replacement for a d-pad on the back of the camera. The joystick is intended to be used for scrolling through settings on the camera. However, if you place the camera in an underwater housing, there's a chance the housing will not have full control over the joystick. Because most housings are not yet shipping for the R5 Mark II, we have yet to confirm if any beyond the Marelux R5 Mark II and Nauticam R5 Mark II housing will give the joystick full functionality. Please feel free to reach out to us with any questions about housing compatibility and controls. So what's the solution to the lack of a d-pad? Controlling your settings with the dials! The EOS R5 Mark II has three nice, big dials - two on top and one on the back. It takes some getting used to, but we found that after a few dives, scrolling through settings via the dials is actually a bit quicker than pressing a d-pad. You just have to develop some muscle memory for accuracy. When you do scroll through menus using the dials, be sure you aren't accidentally changing your shutter speed, aperture, and ISO accidentally.
The Q Menu
The Q menu is the button I use the most when shooting underwater. Q stands for "quick". This menu allows you to access your most important settings with the click of one button. It's what I use to frequently change my autofocus, white balance, and drive mode. Take a look at your Q menu and make sure to get familiar with it. Let's briefly cover what each of these settings does:
AF Mode - The best autofocus setting for you will depend on what type of photos you are taking and your style of shooting. The AF tracking on the EOS R5 Mark II is very advanced and even capable of picking up some fish eyes and faces. To turn on autofocus tracking for any of the area modes, you will need to push the "info" button while that area mode is highlighted. AF spot is great if you are shooting stationary subjects. I also use this as my primary area mode for autofocus tracking. Expanded area AF is a good mode if you are shooting quick animals but don't want to rely on tracking.

AF Operation - AF operation lets you choose between shooting with continuous autofocus or single autofocus. Continuous autofocus, also called AF Servo, is where your camera will continue to adjust focus no matter what you are doing. Single autofocus, or One Shote AF, is where the autofocus will lock after you press the AF-ON button on the back of the camera or half press the shutter button. We recommend using Servo for quick subjects and one shote for stationary subjects.
Image Quality - Generally image quality should be set to RAW - especially if you intend to edit photos in Adobe Lightroom. You can also choose to shoto RAW + JPEG or just JPEG.
Drive Mode - Drive mode will allow you to select how many photos your camera take in a given period of time when you hit the shutter button. Most situations will call for single shooting which means the camera will take one photo when you hit the shutter button. If you are working with quick subjects but you have strobes, then we recommend low speed continuous. If you do not have strobes and need the fastest speeds your camera can offer, then select high speed continuous + which will give you 30 frames per second! Keep in mind that you will get higher drive speeds with the electronic shutter - but then your flash sync speed will only be 1/160.
Metering Mode - If you are using strobes then select spot metering. If you are shooting ambient light then evaluative metering can be a good option depending on your style of shooting.
Anti-flicker shoot - off
White Balance - AWB (will note affect your photo if you are shooting RAW)
Picture style - Standard (will not affect your photos if you are shooting RAW)
Auto Lighting Optimizer - Off
Cropping/Aspect Ratio - Full
Important Photo Menu Settings
The main "menu" button on the Canon R5 II unlocks access to the majority of the settings on the camera. Typically, I will set these settings once for underwater photography and not touch them again - most of my settings I adjust daily are in the Q menu or set with a custom button. The menu is extensive and it does change depending on if you are in photo or video mode. So if you want to change your photos settings, the first thing you need to do is switch the top left switch to "photo mode". The following settings are not a comprehensive list of settings, but rather the settings we deemed most important for underwater photography:
Red Camera Menu
Panel 1
Image Type/Size - This is where you set your camera to RAW and select your JPEG quality. I like to shoot only RAW because I edit all my photos.
Panel 2
External Speedlight Control (Strobe Settings) - leave on default. Please refer to your flash trigger manufacture or TTL converter manufacturer settings in their respective manuals. This always takes priority over the settings below.
Flash firing - Enable
E-TTL balance - If you are using TTL use standard
E-TTL II meter - Eval (face priority)
Contin flash ctrl - E-TTL each shot
Slow synchro - 1/250
Your flash function settings and flash C.Fn settings will be determined by the manufacturer of your flash trigger or sync connection. Please refer to them for the correct settings.
Panel 3
Color Space - Keep this on sRGB if you plan on mostly posting your photos online
Panel 5

Shutter Mode - This allows you to switch between your mechanical shutter to your electronic shutter. Your burst shooting speeds can be quicker in electronic shutter mode but keep in mind that mechanical shutter mode has a higher flash sync speed which is beneficial for underwater strobe photography.
Panel 8
Image Review - I recommend keeping this on 2 seconds so you can see how your exposure and focus is immediately after shooting
Display Simulation - THIS SETTING IS EXTREMELY IMPORTANT FOR STROBE PHOTOGRAPHY. Keep display simulation off when shooting with strobes and on when shooting without strobes (above water). If your screen is black when shooting underwater, make sure you check your strobe settings.

Purple Autofocus Menu
This menu is more streamlined with less options than the original Canon R5.
Panel 1
I set the autofocus operation and area in the Q menu as I spoke about previously.
Whole area tracking servo AF - I keep this setting on when I want to use autofocus tracking. This can also be set in the Q menu.
Panel 2
Subject to detect - set this on animals.
Eye detection - auto
Panel 3
Leave this on Auto

Panel 4
Autofocus assist beam - turn this off
Panel 6
MF peaking settings - keep this on if you plan on shooting with manual focus and you want to see what in your image is in focus.
Blue Playback Menu
I keep this menu in the default settings.
Purple Network Settings Menu
I keep this menu in default.
Yellow Wrench Menu
Panel 1
Format Card - Select this to permanently delete the photos on your card. We recommend doing this before each day of diving so that your card stays healthy and incorruptible.
Panel 3
Screen/Viewfinder Display - With the camera's default settings, the eye sensor on the EVF is covered by the housing back, which causes the camera to "think" that you are looking through the EVF, and it therefore switches to EVF. To correct this, navigate to panel three in the camera menu > "screen/viewfinder display" > then select LCD screen which allows the LCD screen to display at all times. Should you wish to revert to viewing via the EVF, you'll need to change the setting in the menu back to EVF.
Panel 4
Shutter at Shutdown - Leave this on closed so your shutter protects the sensor when the camera is off

Sensor cleaning - this allows you to clean your sensor
Power Saving - This panel allows you to set your dim and sleep settings on the camera LCD and viewfinder.
Panel 5
Custom Shooting Mode - this setting allows you to register your current settings under the C1 - C3 menu options so that you can quickly jump to your settings.
Panel 6
Battery Info - you can see exactly how much battery life you have left here
Firmware Version - This will tell you what firmware version you currently have so that you know if you need to do a firmware update.
Green Customization Menu
This menu is extremely important for customizing your camera.
Panel 1
Customize Buttons for Shooting - This panel allows you to select a button on your camera and reassign it's function.
We have four settings that we think are important to find a custom button to replace the function.
1. Autofocus point selection - this setting allows you to move your auofocus point around if you don't have joystick access on your housing
2. Set AF Point to Center - This allows you to quickly bring the autofocus point back to the center of the frame
3. Start/stop whole area AF tracking - this allows you to quickly start and stop autofocus tracking in your selected autofocus area
4. Switch between VF/Screen - this setting allows you to quickly switch between your viewfinder and screen
Customize Dials/Control Ring - This panel allows you to select your dials and reassign their function. This is useful for moving where your aperture, shutter speed, and ISO setting might be

Orange Camera Menu
I leave this on default.
Green My Menu
This is a good place to save your favorite settings if you want a quick access to your settings.
Important Video Menu Settings
In order to access your video settings, switch your camera to "video mode" with the switch on the top left of the camera. Many of the settings overlap with photo settings but the red camera menu does change quite a bit.
Red Camera Menu
Panel 1
Move rec. size - This is where your set your video frame rate and resolution. I typically shooting in 4K-U 59.94p (frames per second). However, you can increase the frame rate for even more slow motion stability, and you can increase the resolution for more cropping ability. Please note that you may need to change your recording codec in your main rec. format panel.
Main rec. format - this allows you to choose your bit rate and codec (how much data is being collected. For non-log video, we recommend XF-AVC S YCC420 8-bit. This will have a smaller file size for situations where less editing is required. For 8K video, higher frame rates, and Log video recording I recommend increasing your data rages to XF-HEVC S YSS 422 10 bit.
Panel 4
Custom Picture (Log Shooting) - this panel allows you to select your picture profiles, including LOG profiles and HLG. Make sure to turn custom picture on and then to select your CP file.
Panel 5
Set Custom WB - This setting is necessary to set your custom white balance when shooting video. First take a photo of a white slate while you are diving. You will need to do this every few feet you travel at depth. After that go to select custom white balance and scroll down to "select image on card". Hit set and click ok. Then go back to the Q menu and enter your white balance setting and select the registered custom setting. You can save multiple white balance settings if you want to change this at multiple depths.
Panel 7
IS (image stabilizer) mode - I keep digital IS off as it's a bit warpy.
Panel 8
Zebra settings - this allows you to turn on zebra settings and set your zebra levels
Panel 10
Auto pwr off temp - leave this on high as it will extend your recording time
Conclusions
Overall, for the level of functionality, the Canon EOS R5 Mark II is an extremely easy and user friendly camera to use. Many of the ergonomic kinks found in previous Canon mirrorless bodies have been worked out. With the new photo to video switch, it's easy to switch between the two formats during a dive. The Q menu on the camera provides access to the most used settings underwater and the main menu has a few important settings that we've highlighted. While this guide should help you get started taking photos underwater, successful shoots will come with practice.