Sony A1 II Underwater Settings
Posted by Nirupam Nigam on March 5th, 2025

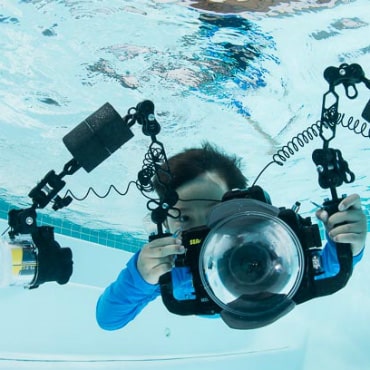
The Sony A1 II is Sony's newest flagship full frame mirrorless camera featuring a 50 megapixel sensor with 8K and 4K/120p video recording. It has everything you could want in a camera and Sony's latest tech - including a pre-capture mode, improved in-body image-stabilization, AI autofocus tracking, and a flash sync speed of up to 1/400s. While the camera shares many similarities to the original Sony A1, with an updated menu the A1 II requires an entirely new set of settings. After diving with the Sony A1 II during our Bluewater Travel Socorro underwater photography workshop, our team has compiled the best Sony A1 II settings for underwater photography and video. If you still haven't pulled the trigger on a new A1 II system, be sure to check out our underwater housing guide for the Sony A1 II!
Top Tip for Underwater Photographers with Strobes:
If your screen is black when you are shooting with strobes, check your live view display settings. Menu -> Shooting Menu -> 10 "Shooting Display" -> Live View Display Set. Turn this setting "off" for photos with strobes and "on" for photos without strobes (including above water), This setting controls if your exposure settings are applied to the LCD or EVF preview.

Sony A1 II Buttons, Dials, Joysticks & Customizations
If you're a Sony aficionado you may have seen that the the Sony A1 II is almost identical in design to the Sony A9 III. Unfortunately, both cameras are just different enough where current underwater housings releases cannot support both cameras - like the Ikelite A1 II housing we used for our review. So if you're a Sony shooter, the a1 II is going to feel very familiar.
The controls on the camera are optimized for flexibility and customizability. There are four custom buttons labeled C1 through C4 where you can assign almost any function on the camera. This is done by hitting Menu -> scroll to the yellow setup menu -> 3 "operation customization" -> camera or movie "custom key/dial set" -> select the button you wish to customize -> choose the correct custom setting in the menu (hitting the delete button gives you a description of the function).
There are two back dials and one front dial on the top of the camera as well as a rotating d-pad. This gives you ample options for assigning shutter speed, ISO, and aperture. For myself, I kept my triangle of exposure dials in default mode. But you can also customize your camera to use one of the dials for ISO. The right dial has a lock so it's important to check if the dial is locked before putting it in your housing.

Assigning Functions to Dials
Menu -> Setup Menu -> 4 "dial customize" -> camera/movie custom key/dial set. -> select a highlighted dial -> find the exposure setting you wish to control in the menu and select it (e.g., ISO, shutter speed, aperture).

Mode Dial & Movie/Photo Toggle Switch - Memory Recall Settings
The Sony a1 II has a movie and photo mode toggle switch below the mode dial. This makes it easy to switch between taking photos, videos, and S&Q video. The mode dial above the toggle is used to switch between manual mode, automatic modes, shutter priority, aperture priority, and your memory recall settings. To set your memory recall settings, To set your memory recall settings, click the "menu" button -> go to your "shooting" menu -> 4 "shooting mode" -> "camera set memory" -> select 1, 2, or 3.
If you are in manual mode on the mode dial, you can switch between manual mode in photo mode and video mode just by using the toggle switch.
Drive and Autofocus Dial
On the left side of the camera, there's an autofocus and drive mode dial. I find that this dial is rather unnecessary and frustrating - requiring a variety of workarounds if you don't want to physically control the dial. Usually, I change these settings before putting the camera into the housing and I lock the dial so that I don't have to worry about changing them underwater. However, with the drive mode dial, you can also set it to "*" and custom set a button or setting in your Fn menu so that you can change it in camera. I prefer to shoot the A1 II in low continuous mode (the icon with multiple rectangles and an "L").
The autofocus mode must be changed using the external autofocus dial unfortunately. I leave it set to "AF-C" which is autofocus continuous mode. This allows the camera to focus all the time and to take photos even if the camera isn't "locked" onto a focus point. The A1 II's autofocus system is so adept that this is my method of choice in all of the shooting I do. But if you struggle with macro photography, you could consider AF-S.
Considerations for Underwater Housings
Joystick and AF Point Selection
Selecting your autofocus point with the Sony a1 II can get a little tricky underwater if your housing does not have compatibility with the joystick. Above water, both the touch screen AF and joystick can be used to move your AF point around. Unfortunately, not all housings support the joystick underwater. If you need joystick compatibility underwater, Contact Us to find you the right housing. If your housing does not have joystick compatibility, there are a few work arounds to move your autofocus points underwater:
1. In photo mode, we recommend using AF tracking. This allows you to press the AF-on button or half press the shutter button when your AF box is over the area of the image you want in focus. Then you can move the camera and the camera will track the subject.
2. In video mode, sometimes we recommend using the "wide" AF area mode, but we found it was not it is not accurate at selecting an AF point in macro situations or situations with low light. For macro shooting, we recommend choosing a center AF area mode and allowing the camera to lock on to your subject with your subject in the middle. Then we recommend customizing the joystick button to toggle between autofocus mode and manual focus mode, as described below. When your subject is locked-in, you can select the joystick button and it will switch to manual focus mode. As long as you have focus peaking on, you can pan in and out with the camera and see when your focus in the right spot.
3. Try out this customization to move your AF points with dials shown by our friends at Sea & Sea:
Customizing Your Sony A1 II Settings
As I mentioned, the Sony a1 II is very customizable. The camera even has four custom buttons (c1-c4) that you can dedicate to your favorite custom settings and I highly recommend using them. To customize your buttons, click the "menu" button, go to the yellow "setup" menu, panel 3, and select "custom key/dial settings." One option allows you to select settings in video mode and one allows you to select customizable settings in photo mode. If you wish to use the same custom setting in both modes, you can leave any button in the default "follow custom (*)" key. Every workflow and shooting situation will require different custom settings. Our custom buttons were set in photo mode. In video mode customization, we set our buttons to default to photo mode. This is a good starting point, but you can also set up different photo and video workflows - if you can remember all the different button combinations! Here are our top recommend custom settings:

Rear1
1. Drive - this will allow you to set burst shooting
2. AF On
3. Movie Shooting - this is your record button, don't change it
4. APS-C S35/Full Frame - this will allow you to crop to super 35 mode with a push of the button if you are shooting at resolutions smaller than 4K
5. Focus Mode
Rear2
1. AF/MF Selector Toggle - this will allow you to adjust between AF mode and MF so that you can lock on your subject with AF when shooting video and then switch to MF and fine tune by panning in and out.
2. Not Set - you want your center button to be able to select other functions
3. Drive Mode
4. ISO
5. Focus Magnifier - this allows you to fine tune your focus by zooming in on the focus area of the subject
Top
1. Finder.Monitor Sel - this will allow you to switch between the EVF and LCD in your housing and is a very useful function.
2. Focus Area Lens
Dial/Wheel
1. ISO
2. Av/TV (M) (Shutter Speed in Manual Mode)
3. Av (M)/TV (Aperture in Manual Mode)
The Fn Menu
The Fn button on the back of the camera is perhaps the most useful button on the system - it opens the Function menu. When you're in an intense shooting situation, the Fn menu allows you to pull up your most important settings and quickly change them. We highly recommend customizing your Fn menu so that you can access the most frequent settings you will be changing. To customize your Fn menu, click the "menu" button, go to the "setup" menu, panel 3, and select "Fn menu settings."
The Fn Menu in Photo Mode
Here are our top settings for the Fn menu in photo mode:
1. Drive Mode - allows you to choose your burst shooting mode
2. Flash Timing Setting - adjusts the flash timing when the amount of light is insufficient in high speed sync shooting
3. Focus Mode - We like to set this at AF-C. We found that AF-S was actually slower than using autofocus continuous.
4. Live View Display - turn it on for shooting ambient light photos and photos with video lights. Turn it off for shooting with strobes. If your screen is black when you are shooting with strobes, check your live view display settings.
5. Focus Area - Tracking: Expand Spot is our favorite setting as the AF tracking is very accurate. 6. White Balance - won't affect your image if you're shooting RAW
7. Face/Eye Subject - Setting the a9 III to animal eye AF tracking does work on fish from time to time. If you want animal eye AF tracking, the Canon EOS R5 or Nikon Z8 is a little more capable.
8. Steady Shot - On
9. ISO - the base ISO on the A9 III is ISO 250. Going below that will not improve the quality of the image
10. Prioritize Recording Media - allows you to select your card slot
11. Metering Mode - set to spot metering if you're using strobes
12. Silent Mode - this is useful for topside shooting

The Fn Menu in Video Mode
Here are our top settings for the video mode.
1. Audio Rec Level - adjust your audio levels. It's a good setting for topside shooting
2. Peaking Display - allows you to turn on peaking display for finetuning manual focus. We recommend setting your peaking display color to red underwater.
3. ISO - Adjust your ISO for proper exposure
4. Focus Mode - AF continuous or Manual Focus, it's your choice
5. Focus Area - in AF-C we use wide for most situations or expand spot if your housing has compatibility with the joystick
6. White Balance - read on to learn how to set custom white balance
7. Picture Profile - allows you to select Log profiles including S-Log2, S-Log3, Cine profiles, HLG, and more.
8. Steady shot - Set to active if you're not using a tripod. This will introduce a crop, but you need as much stabilization as you can get underwater. Use standard if you have a tripod or a really calm shooting environment.
9. Prioritize Rec. Media - Pick your media card slot
10. Zebra Display - turns your Zebra stripes on and off. You can set your exposure levels for the zebra stripes in the menu.
11. Metering mode - we use spot standard with a video light and multi if the ambient lighting conditions are good.
12. Exposure mode - allows you to switch between manual, aperture priority, shutter priority, and program mode in video
13. There aren't 13 slots in the Fn menu, but we also recommend adding a Live View Display setting if you are a photographer. That way you can turn on live view display when you are shooting video.
Strobe Considerations
Most cameras on the market are limited by what's called a "flash sync speed." This is essentially the highest shutter speed that a camera can shoot with strobes before you start seeing a black bar in your images as the strobe gets unsynced. Most camera sync speeds are around 1/200s. The Sony A1 is incredible in the fact that it can sync with strobes up to 1/400 of a second (and 1/500s if you set the camera to APS-C mode). Setting your shutter speed high allows you to capture quick action and freeze it. It also allows you to control your ambient light - especially if you are shooting into the sun for a sunball effect.
Key Menu Settings
After setting up your Fn menu, the main menu becomes your repository for everything you might need to do with the A1 II. Here are a few top menu settings that we recommend for underwater photography:
Panel 1 Shooting (Red)
1 - Image Quality/Rec - Image quality settings (RAW) - File Format (XAVC HS 4K) - Movie settings (60p) 10-bit 4:2:2 - Color Space sRGB. You can also choose 4K/120p if you want to slow down your footage and stabilize it. And you can choose 8K/30p if you want to crop your video significantly in post production.
2- Format (under media)
4- Shooting mode - You can set your memory recall function here.
5 - Drive Mode - set this in the function menu. Continuous low is our recommended option with strobes. This section also has pre-capture settings that can be turned on in electronic shutter mode. Pre capture allows you to take photos before you hit the shutter button but it does burn through battery life.
8 - Image stabilization - steady shot adjust - changes stabilization based on focal length of lens
10 - Shooting Display - Live View Display (off with strobes)

Panel 2 Exposure/Color (pink)
3. Metering - metering mode - spot is good for TTL and strobes, multi for video
4. Flash Mode - we recommend fill flash.
7. Zebra Display - you can set zebra displays to see if you highlights are blown out.
Panel 3 Focus (purple)
1 AF/MF - AF illuminator (off) - AF w/ Shutter (on) - Pre-AF (off)
2. Leave these settings in default
3. Face/Eye AF - Subject recog in AF (on) - Recognition target (animal or animal/bird; recognition sensitivity - 5 (high))
5. Peaking - peaking display (on) - peaking level (mid) - peaking color (red)

Panel 6 Setup (yellow) 3/4 - customization (See above)
7. finder/monitor - select finder/monitor (monitor (manual) for LCD and VF (Manual) for viewfinder)
8. Display Option - Autoreview (2 sec)
Top Underwater Video Settings
Selecting Your Frame Rate and Resolution
The Sony A1 II is an excellent video camera and we highly recommend filming at 4K resolution for general underwater shooting. If you are shooting very small macro subjects, then you may want to consider 8k video. For most underwater shooting, I recommend filming at 60 frames per second so you can slow down your footage in post processing for stabilization. For additional stabilization and slow motion effect, you can choose 120 frames per second.
To select your resolution go to the menu -> shooting menu -> 1 "image quality" -> File Format. The resolution options provided are paired with a file format (aka codec). To set your frame rate go to menu -> shooting menu -> Image Quality -> Movie Settings -> Rec Frame Rate.
After selecting your frame rate, you'll want to choose your bit depth and bit rate. If you are shooting Log picture profiles like S-Log2 and S-Log3 then we recommend selecting 10-bit 4:2:2 for the most accurate color gamut. If you are shooting the standard picture profile then 8-bit 4:2:0 should be sufficient for the data that you need. To select your recording settings go to menu -> shooting menu -> Image Quality -> Movie Settings -> Record Settings. To turn on Log recording, go to menu -> shooting menu -> Image Quality -> Log Shooting Settings. In this setting you can turn on Log, select the Log type (color gamut) and add a LUT to properly view your footage while filming.

Selecting Your Codec
The file format, or codec, you choose will determine how much your video is compressed and the bit rates you are able to shoot at. An uncompressed codec will take up more space on your hard drive, but it will also be easier for your computer to process as it will have to do less work decoding. So the more compressed your video is, the more time you should plan on spending in post. Here are the three 4k codecs available to you when shooting 4K.
1. XAVC HS 4K - This is the most compressed codec and we generally don't recommend using it unless you need to save a lot of space and want to spend more time in post processing. It uses an H.265 compression standard that some graphics cards may have trouble handling.
2. XAVC S 4K - This is Sony's standard file type, and the codec that will suit the widest range of needs. We recommend this file type for most video shooters. It uses an H.264 compression standard that should be relatively easy to handle with standard editing software and graphics cards.
3. XAVC S-I 4K - Ths is the least compressed file type available. It will be easier to playback, but it will also create large file sizes. It features a bit rate of 600M 10bit 4:2:2 at 60fps - that's a lot of data!
Setting a Manual White Balance
To set a manual white balance on your camera, select the white balance setting in your Fn menu, scroll down to custom 1, click the right button on the dpad to highlight "set", click your center button, line up the square with a neutral area in the image or a white slate, and hit the center button to lock it in. You will need to do this every few feet of depth that you go up or down in the water column.


Recommended Picture Profiles
Standard (No Picture Profile) - We recommend the standard picture profile if you don't want to do much color grading or post processing. Sony's standard picture profile is quite nice, but you need to be accurate with your exposure and white balance when you shoot with the standard profile.
S-Log2 - S-Log2 offers the most detail out of the Log profiles with the least risk for introducing noise compared to other S-Log profiles. It is more difficult to edit than HLG or Cine profiles, but it can produce some of the best results. S-Log2 must be shot at a minimum of ISO 800. Try to use this profile in situations with a lot of light. We recommend overexposing your scene rather than underexposing.
S-Log3 - S-Log3 offers more detail in the shadows than S-Log2 but it can be more difficult to work with and introduce more noise as well. S-Log3 must be shot at a minimum of ISO 800. Try to use this profile in situations with a lot of light. We recommend overexposing your scene rather than underexposing.
HLG3 - HLG3 is our top recommended Log profile. It's easier to work with than S-Log2 and allows you to shoot at lower ISOs down to ISO 200.
Cine2 - Cine2 is a good hybrid between a Log profile and standard profile which makes it the easiest Log profile to work with in post. This is a good middle ground if you want to do some work in post but not a lot.
Quick Video Tips
1. Your shutter speed should be roughly twice your frame rate
2. Your aperture should be f/13 or higher for wide angle video. For macro, if you want background blur than use a lower f-stop, if you want most of it in focus, use a higher f-stop
3. After setting your aperture, adjust your ISO until the video is properly exposed. ISO in video can be moved higher than in photography. Shoot with auto ISO if you are in a dynamic lighting situation.
4. Set a manual white balance as described above if you are shooting wide angle video without video lights. With video lights, shoot auto white balance.
5. Use spot or center metering with video lights and matrix metering without video lights.
Conclusions
As a flagship camera, the Sony A1 II is quite formidable - in its flexibility, capability, and complexity. These settings that we are sharing are what we have found works best for us. But you might find other settings and other workflows that work better for your shooting situation or goals. For instance, if you are an ambient light photographer shooting quick action, you're going to end up using precapture and an electronic shutter. But if you're shooting with strobes, it's best to stick to a mechanical shutter and a high flash sync speed. And though all of this sounds daunting, the important thing is that we're here for you. Whether it's via email, helping you set up your next Sony A1 II underwater housing, or during one of our popular Bluewater Travel underwater photo workshops.

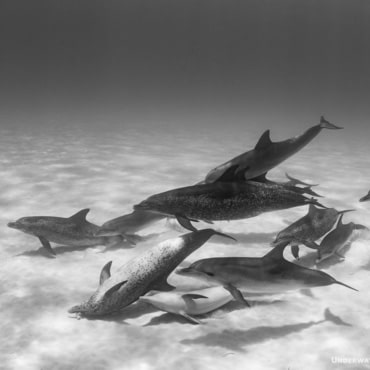
manta rays in Socorro photographed with the Sony A1 II